I am not a professional photography, just an avid amateur but several of my friends and family have complimented me on the travel photographs in my blog and those I share on Facebook. In fact, this blog is the result of some comments from friends and colleagues that my photos are travel magazine quality, and I should share with others.
Some colleagues then suggested I share how I took these pictures, so that others could make beautiful, emotion-evoking memories too.
So here I will share the techniques I learnt from magazines, instructors, websites and from trial and error.
My techniques are not professional or perfect, so please share your comments and insights so that I can improve too.
Let’s start with this picture.
Topic: Symmetry
It is a dawn shot taken in Bali. We stayed at this awesome beach front villa called Bayu Gita. It has 6 rooms.
http://www.villabayugita.com/about-villa-bayu-gita/bayu-gita-beachfront/

What makes this picture work:
The composition here is based on symmetry. To capture the two statues, I had to use a lens wide enough. There are two points of symmetry – the two statues, and the reflection of the clouds onto the pool.
As a rule of thumb, never put the objects of interest at the center. Keep them to the side, so the eye moves across the picture, giving it a more interesting feel as you draw the viewer into the scene.
Lens: Tokina 11-16mm.
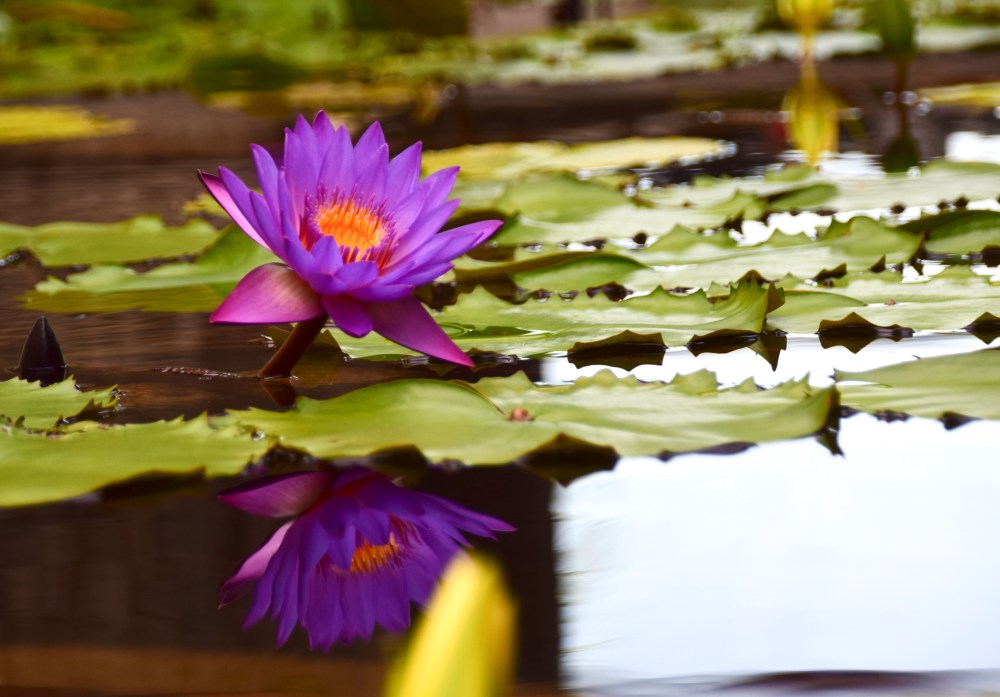
2 more examples of compositions using symmetry and keeping the object of interest away from the center. This is a picture of the pool taken at dawn of Kirimaya Golf Resort, Khao Yai, Thailand. The picture below is a lotus taken at Bayu Gita.
http://www.kirimaya.com/resorts/kirimaya-resort/

Topic: Leading Lines
What makes this picture work:
Using lines in a picture to ‘lead’ the eye is a composition technique called ‘leading lines’. Leading lines lead the eye towards an object of interest. Remember in composing a picture, you want the picture to tell a story, and you want to lead the eye to discover the story.

This picture uses shadows to form the leading lines, so there is another technique at play here which is to use light to create emphasis on your object of interest. But the concept of lines leading the eyes is the same.
This was taken in Tokyo during a photography lesson. Check out this photography class in Tokyo when you visit this awesome city.
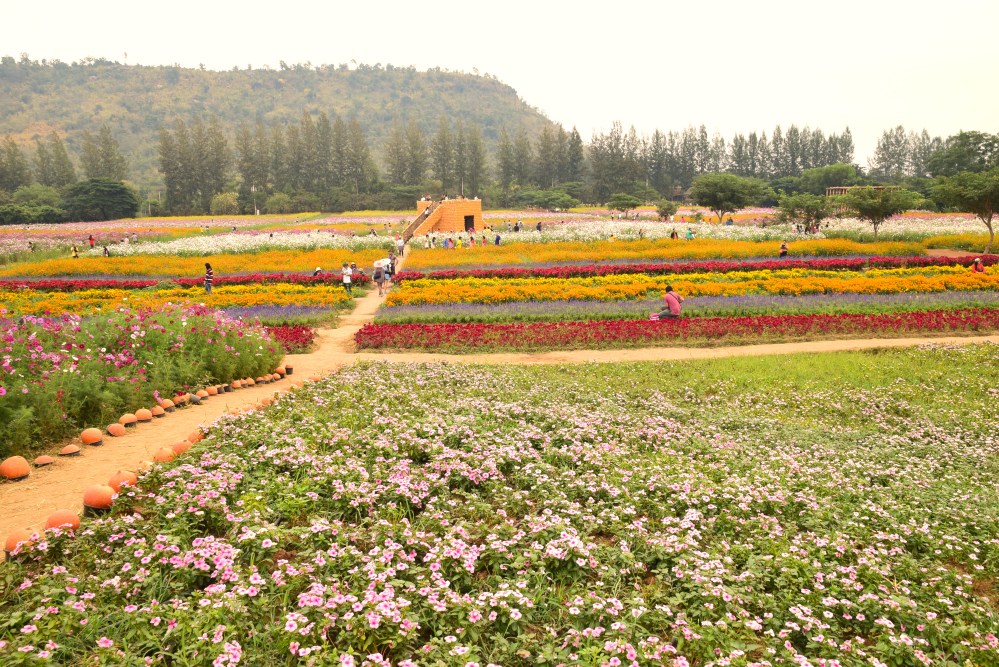
The picture below uses the path as a line to lead the eye from the front of the picture to the end, where there is an object of interest (the building). This place is a floral heaven for those who love flowers. This farm is Jim Thompson farm, 2 hours from Bangkok.
http://www.jimthompsonfarm.com/JIMTHOMPSON_FARM/ENGLISH.html
This bridge acts as a leading line, leading the eye to explore the objects of interest, the role of buildings that stretches across the picture.

The pool side lines, as well as the row of deck chairs, act as the leading lines in the picture below. The object of interest in this case is the symmetry of the building and its reflection, with the lines leading the eyes to the object of interest. Once you have developed the eye for composition, you can combine techniques to bring out the best in your pictures.
This beautiful resort is the atta resort suites at Khao Yai, Thailand.
http://www.kirimaya.com/resorts/atta/

Black and White (B&W)
B&W photos work best when there is a strong contrast and shadows, or strong features that can be accentuated when turned into B&W.
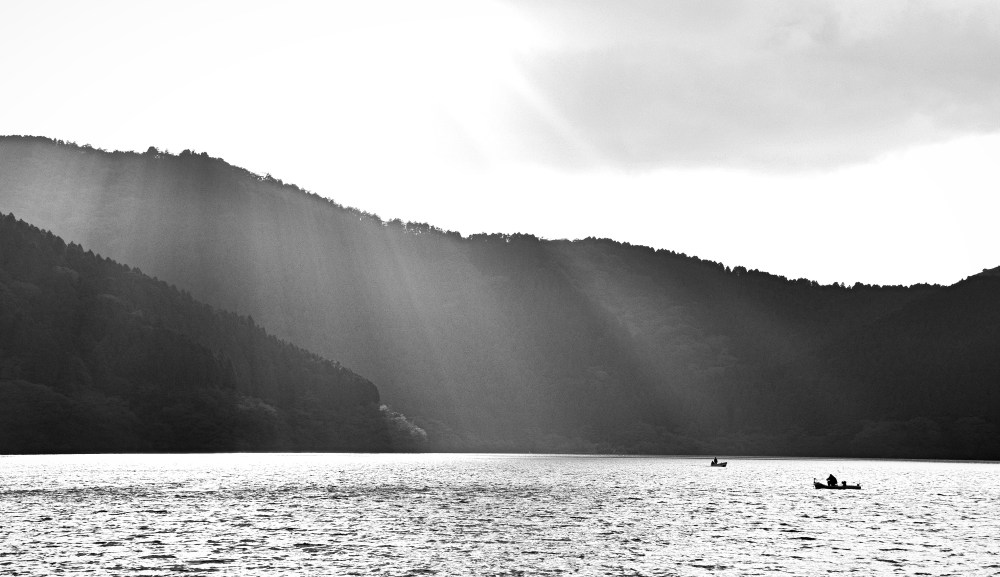
This picture works because of the strong rays of light against a dark background (the hills). This is a picture taken during late afternoon on Lake Ashi, Mount Fuji. The angle of the light and the intensity of it makes this an ideal picture for B&W because of the contrast. As a colour photo, it will have less dramatic impact.
This picture works because of the strong back light caused by the late afternoon sun. It gives a strong backlight to the object of interest. Another technique used in this picture to fill the image and eliminate any empty or useless space that distracts from the objects of interest. In this case, I used symmetry to fill the image with the reflection of the building.

This picture works because of shadows.This is a traditional kitchen in rural Bali, and the sunlight falls nicely across the room, separating the room into two parts, one illuminated and the other in the dark.

This picture works because of the contrast between the clouds and sky. The cloud pattern becomes impactful and creates a dramatic effect against the sky.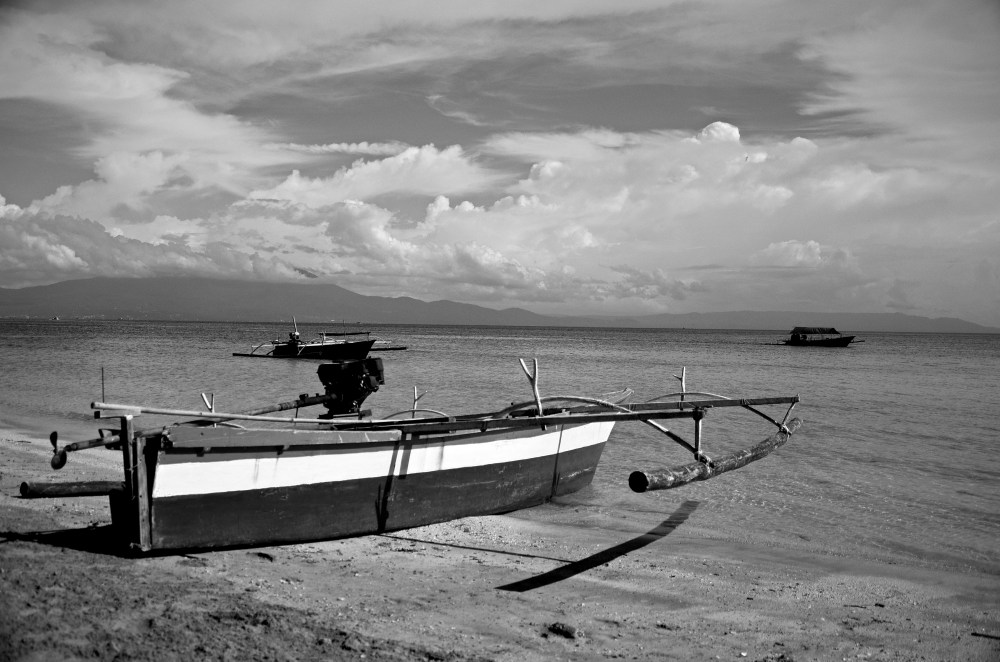
Light Lines and Ghosting
Now, let’s technical. No night city photography collection is complete without capturing light lines and ghost images. The technical aspects are not difficult. What you need is:
- A tripod
- A camera that allows you to control Shutter speed and ISO
Technical settings:
- Set your ISO to the lowest – 100
- Set your shutter speed to 1/10 or 1/15. You need it to be long because you need to capture the ‘distance’ of car movement to have a long straight light line or a diffused image of a person over a distance.
Composition:
- Be sure to to capture a stretch of distance. What do I mean? Cars or people need to be captured over a distance to create the light line or the ghost effect. Thus the positioning of the camera is very important. See below:


Still Pictures against a Moving Object
What makes this picture works:
This picture works because of the contrast between movement and still objects, creating a sense of life. This technique is very useful for capturing motion and city life.
To do this:
- Set your shutter speed to 1/5 sec.
- Make sure you your camera/object of interest is 90 degrees, or perpendicular to the moving object.
- Focus your camera on the still object and click while the moving object passes by. The camera will do the rest.
The secret is found in the angle of the object to the movement – 90 degrees. Any less or more, the movement will not be captured.


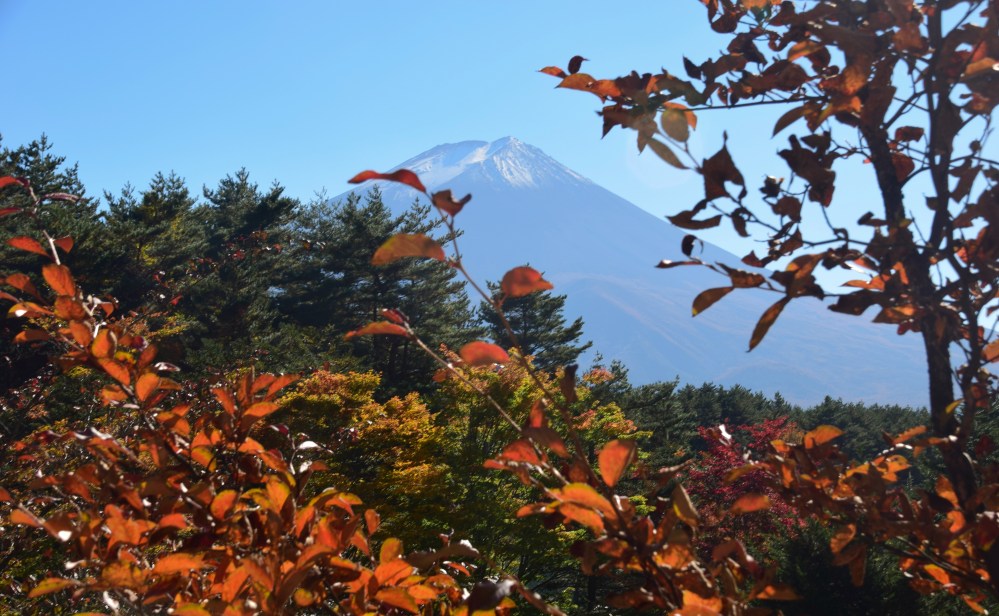
Framing
These pictures work because of a technique called framing. Framing means to put the object of your interest within a ‘frame’ to increase the level of interesting detail, and to show the relationship between your object and its surroundings.
In this picture below, Mount Fuji is ‘framed’ by autumn leaves, giving it another layer of detail and tells the story of Mt Fuji in autumn. It makes the picture richer than just the mountain against the sky.
The traditional tea house in a park is framed by maple leaves.
The traditional house below is framed by the taller buildings, giving a nice contrast between modernity and tradition.

Remember, the purpose of framing an object of interest is to allow it to tell the story of the object in relation to its surroundings.
Bokeh Effect and Reverse Bokeh Effect
What makes these pictures work is the closed-up zoom on the object of interest and leaving the surroundings in a blur. This blurring effect is known as the bokeh effect.
To do this,
- Set your camera to Aperture mode, and turn it to the widest aperture settings – usually f2.8 or f.3.5
- Zoom and focus on an object of interest, you will see the background blurring then shoot


The picture below has what I call reverse bokeh. In this case, I focused on a far object, and let the near objects blur, this reverses the bokeh effect and creates a sense of distance. To do this, you need a telephoto lens.
- Zoom and focus on the far object of interest, and then half-click to blur the features nearby. Make sure your aperture is set high.
Lens used: Sigma 18-250mm.

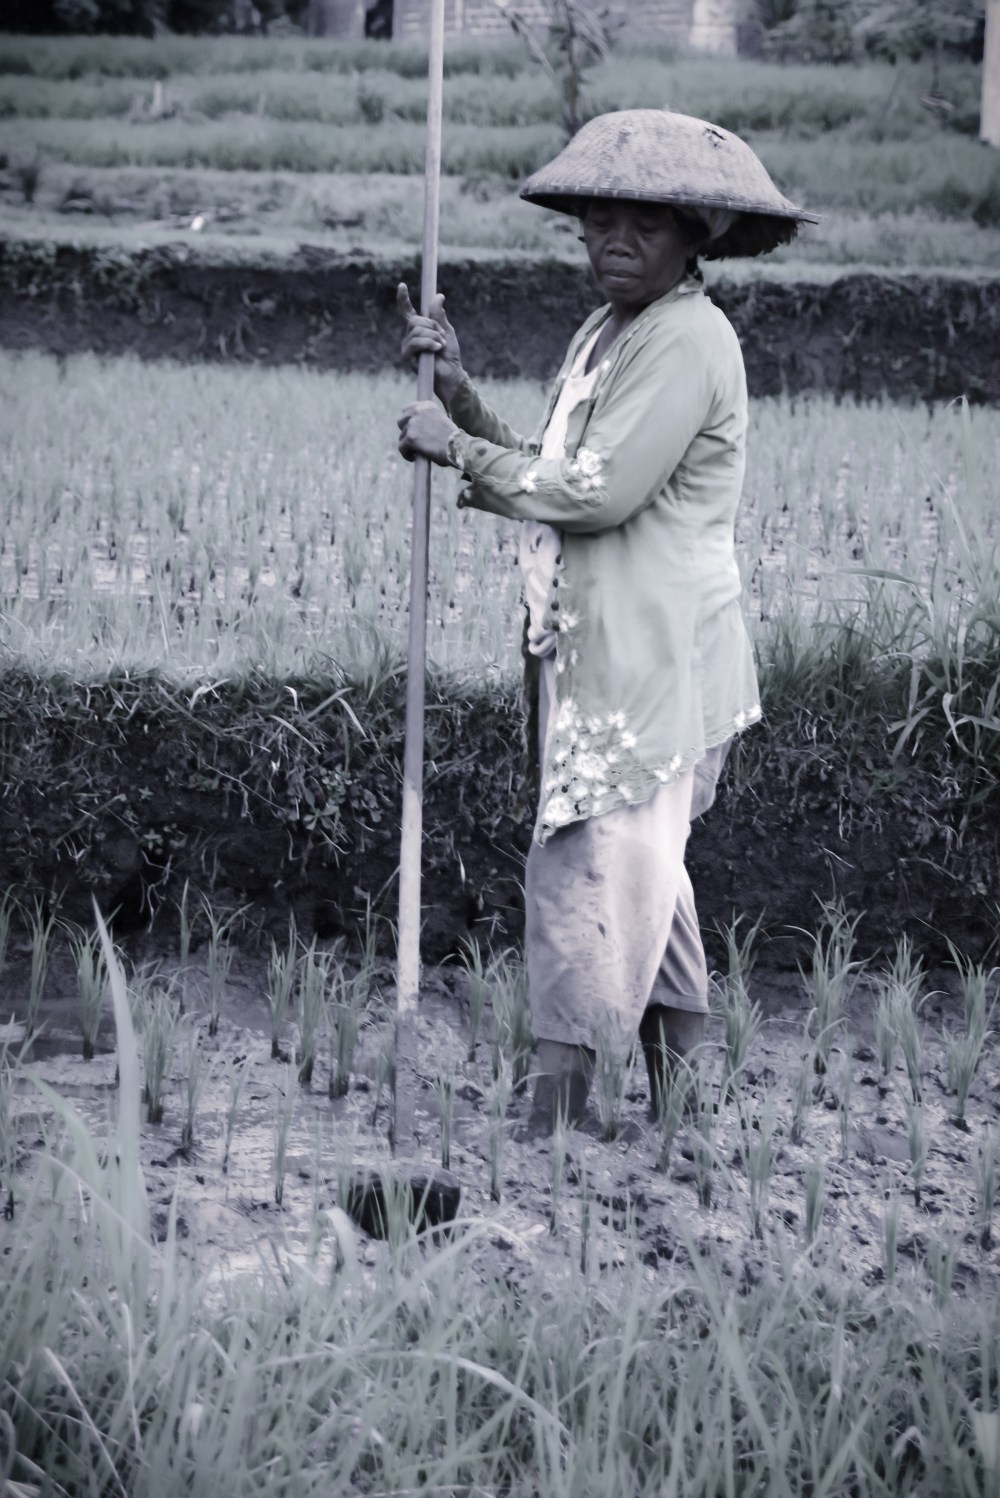
Shooting People
I am not a fan of portraits, but I prefer to take people from the photojournalism point of view – tell a story.
Therefore, I try to capture people in a form of action or activity, so that their expressions are in context to their surroundings or their circumstances. Try to imagine how your photo will tell a story about the person’s life, and find that angle to capture it.